
ArcGIS Online managers can bulk export their Organizations Named Users into a comma separated file (.csv) using the new Reporting Tool ( ESRI officially released it June 30, 2020)
The issue is the exported (text) format of their Last login Date attribute field within the exported user table. Importing the .csv into another Google Sheet or Office365 Excel file disables the sort by Date option that can help determine which accounts maybe dormant within the ArcGIS Online organization. Date field formatting issues are a common within Time-Enabled Data Analysis too, so I’ve provided one possible solution it this common issue. I’ll demonstrate using a ‘go to’ product for non-programmers, Microsoft Excel software has many powerful features. Although, it’s not a true database it has a lot of useful data formatting capabilities and is often used in small businesses around the world.
Goal: Use Office365 (Excel) to convert the text field (column) into a correctly formatted Date column within the Excel worksheet.
- This tutorial walks you through Excel’s Import Text to Columns tool (within the Data Tab) to import the text formatted Date column values into three (new/empty) columns within the same Excel worksheet.
- Then, I demonstrate using a DATE function to convert those three columns (Month, Day, Year (txt)) into a proper Date format using the DATE function within an Excel formula.
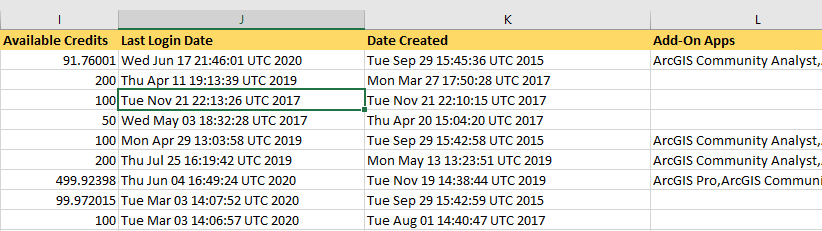
- In this example, I’ve already exported the ArcGIS Online Users Report into a .csv from within an AGOL Organization I administer. I then imported it into Excel (Office365) and used File> Save As to create a new copy of the data in a proper, Excel Worksheet file (.xlsx)
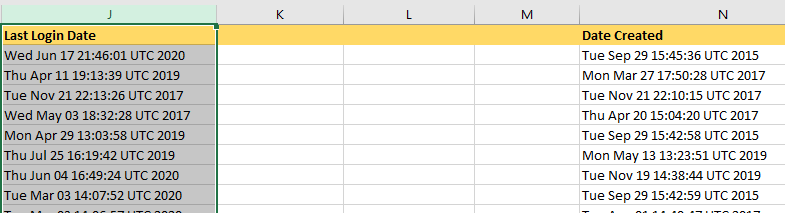
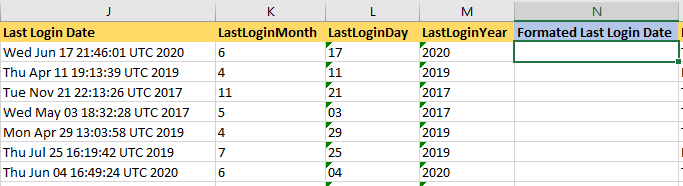
Below, you can see the originally formatted (Last Login Date) column within the imported Excel file. btw- It works perfectly well within ArcGIS Online, but once its exported, the sorting by Date/Time is often lost, and this DATE formatting issue is a very common data problem for scientists/data developers everyday so I thought I’d share this solution with my EAST peers.
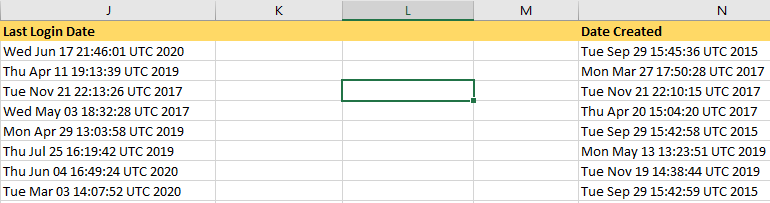
- Once Imported into Excel and saved as an .xlsx format, Insert three empty columns between the Last Login Date and the Date Created columns.
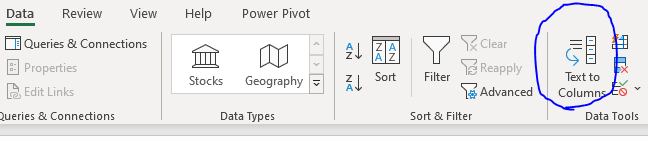
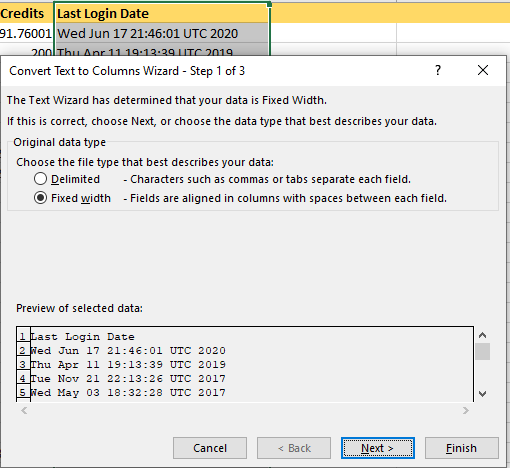
- Switch to the Data Tab within the Excel menu and look for the Text to Columns wizard.
- Next, Left-click to select the Last Login Date column within the Excel worksheet
- Then, the Text to Columns Wizards (3-steps) opens; choose the Fixed Width option within the first step.
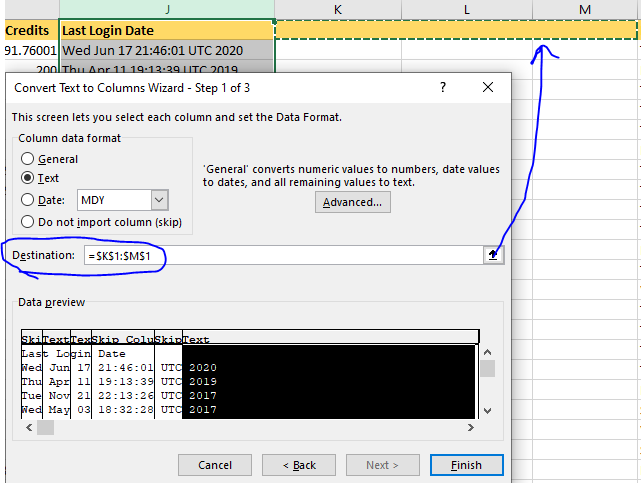
- Move to the (3 of 3) Step within the Wizard, and then Select each COLUMN within the “Preview of selected data:” and ignore the unwanted Weekday, TIMESTAMP and UTC columns within the preview; those are not needed so they’re not imported. Import ONLY the Month, Day(number), and Year as TEXT format.
- Make sure to DEFINE the Destination of these parsed values by “click-n-dragging to select those 3 empty columns you created earlier”. (review the image below to see what I mean)
- Make sure to select the TOP ROW of the worksheet too, so that the partial header/ text gets written into that row! you can rename those column headings, anyway.
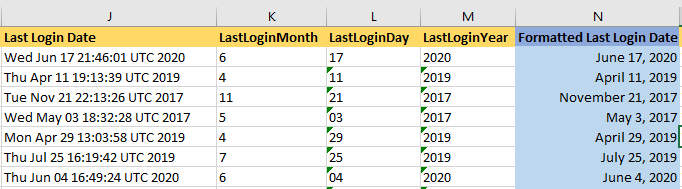
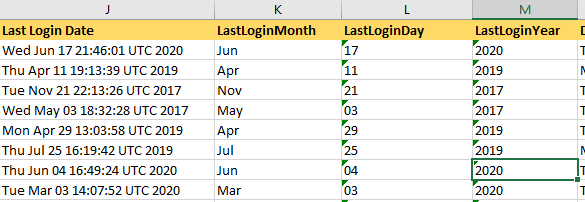
- You can rename the column headings for those three new/imported columns and it should look something like this after you’ve clicked Finish on the Import Text to Columns wizard.
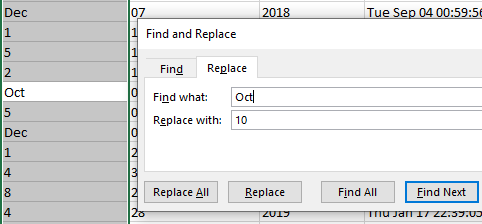
- Next Step use the FIND/REPLACE tool to update all of the 3 character MONTH abbreviations (LastLoginMonth) into the number for each month. There is likely a better way to do this(! via python), but I’ll use the Excel Find & Select tool to accomplish that column value conversion. It is on the Home tab of Excel 365 under the Find & Select tool.
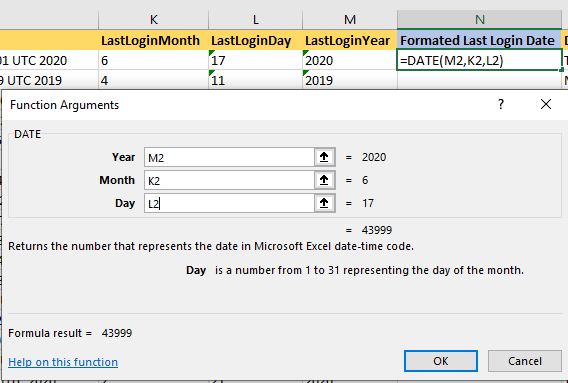
- Now, we can use these three columns to calculate an actual Date value for the Last Login by using the DATE function within Excel. Review your ribbon view within Excel to the Formula tab, then SELECT the first row within a new column you insert after these three newly imported text values. (like below)
** Format the NEW excel worksheet column into the DATE format, prior to performing the next calculation using the DATE formula. (yes, I misspelled formatted too, sorry about that typographical error.)
– the Author
- From the Date & Time button on the Data Ribbon within Excel365, choose the first Function DATE so that it’s dialog opens. Fill in the Function Arguments by clicking within the argument setting within the dialog box and then selecting the corresponding column within the SAME ROW as your formula your creating for your new DATE value…
- The resulting column properly formatted (and correctly spelled) with the Date each user Last Logged Into our ArcGIS Online organization.

- Whew! That export format (and this DATE conversion methodology) will most likely need to be updated.
- I hope this Excel tutorial on Date field reformatting may help you overcome this common data processing obstacle.
- I’ll be patiently waiting for you to provide a simple python script or new to me export/import option that illuminates this multi-step process.
Take care; be well and share what you know with others.
– Brian Culpepper